Setting Default CALs in Portal
Client Access Licenses (CALs) in VIDIZMO determine the access rights and permissions for users within the portal. VIDIZMO allows its users to view these access rights and permissions for each user's CALs. All feature permissions associated with CALs are displayed on the CALs portal screen.
VIDIZMO simplifies the process of assigning permissions to new users by offering default CALs. The portal user with portal management feature permission can set the default Client Access Licenses (CAL). The default CAL is set up to ensure that when a new user enters the portal and is added through the user and group management, they will be automatically assigned this default CAL.
To better understand the CALs in VIDIZMO refer to the article “Understanding CALs in VIDIZMO.”
Prerequisites
- The individual must either be a member of the User Manager group or have User Management permissions enabled.
Viewing CALs in Portal
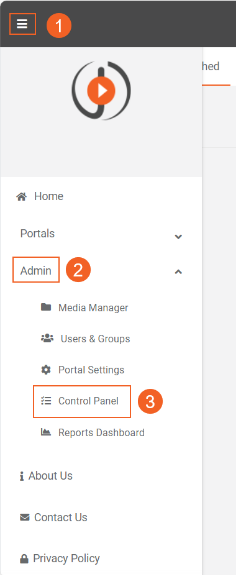
From the Portal’s Homepage:
- Click on the navigation menu on the top left of your screen.
- Expand Admin tab.
- Click on Control Panel.

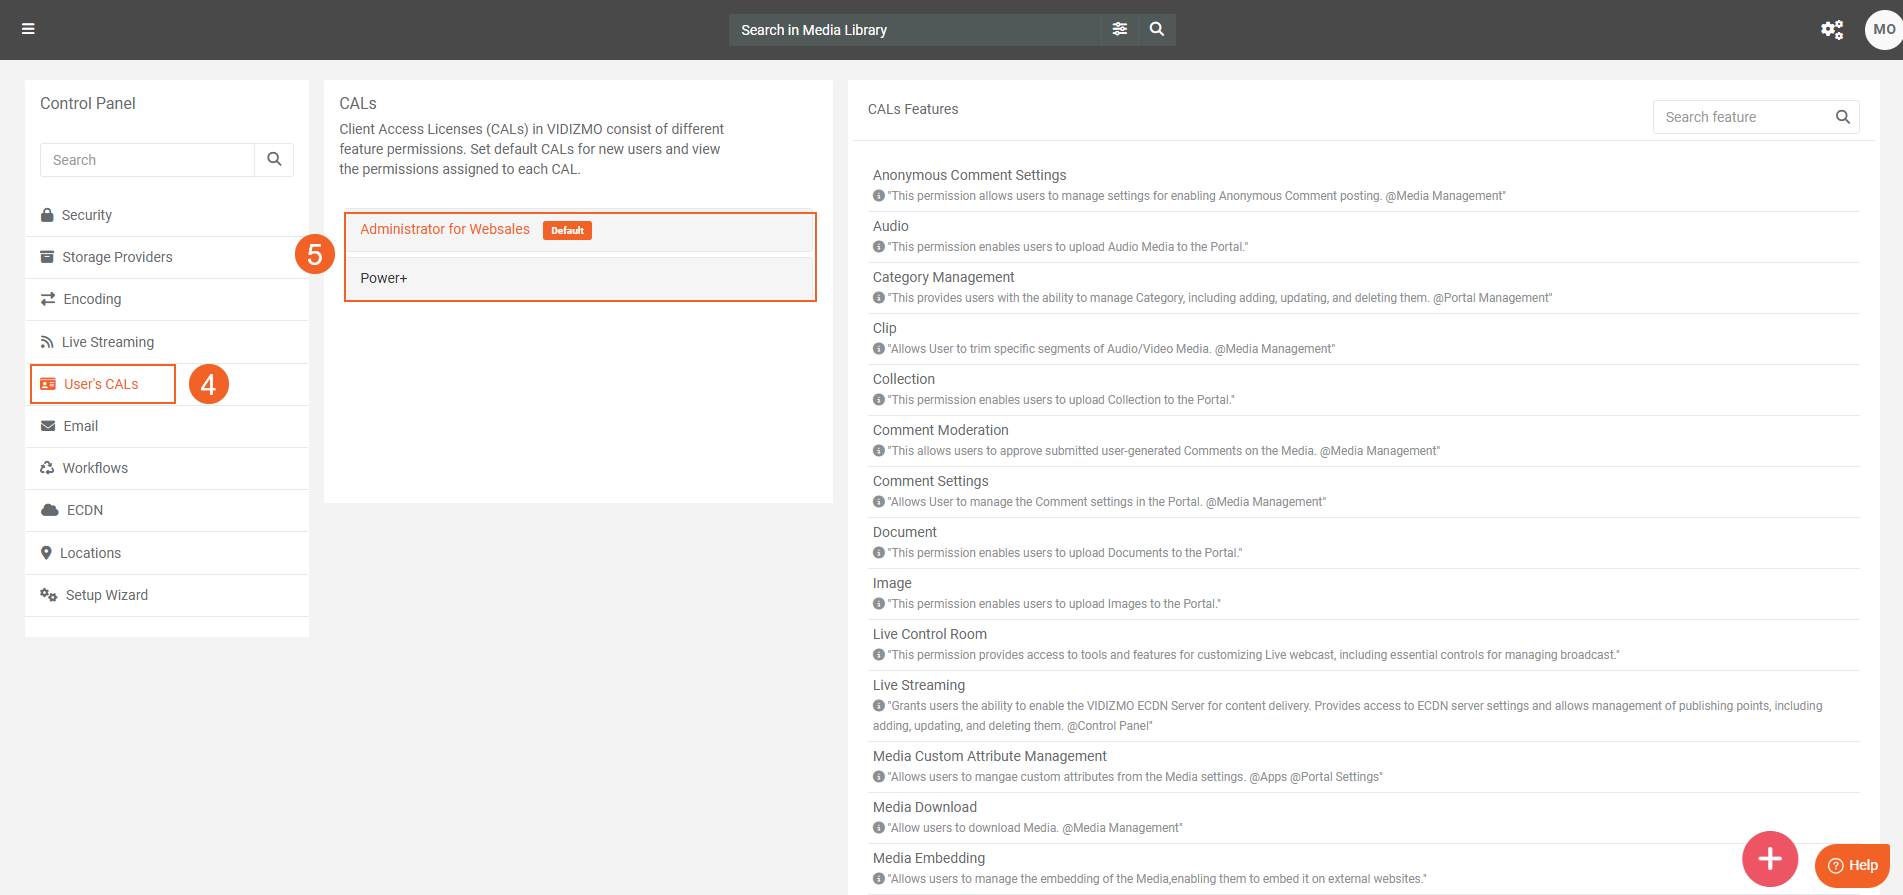
From the navigation pane in Control Panel:
- Select User’s CALs.
- Select any CAL from the available list of options to view the feature permissions associated with each Client Access License (CAL) within the VIDIZMO portal.

The feature description in the screenshot above helps you view all the feature permissions present in a CAL on a Portal.
Note: The CAL name may vary depending on your purchased product plan.
- These define the features of the application that the user interacts with in the VIDIZMO Portal.
- These define the actions that can be performed within a feature in VIDIZMO.
This display provides a comprehensive overview of the rights and permissions associated with each action within the feature's scope in the application. A user can only perform or access features that are enabled in their current Client Access License (CAL).
If a user requires access to additional features or full feature access, they must obtain a CAL that includes the necessary permissions. Users can purchase additional CALs or different CALs with the required feature permissions from the product purchase VIDIZMO website.
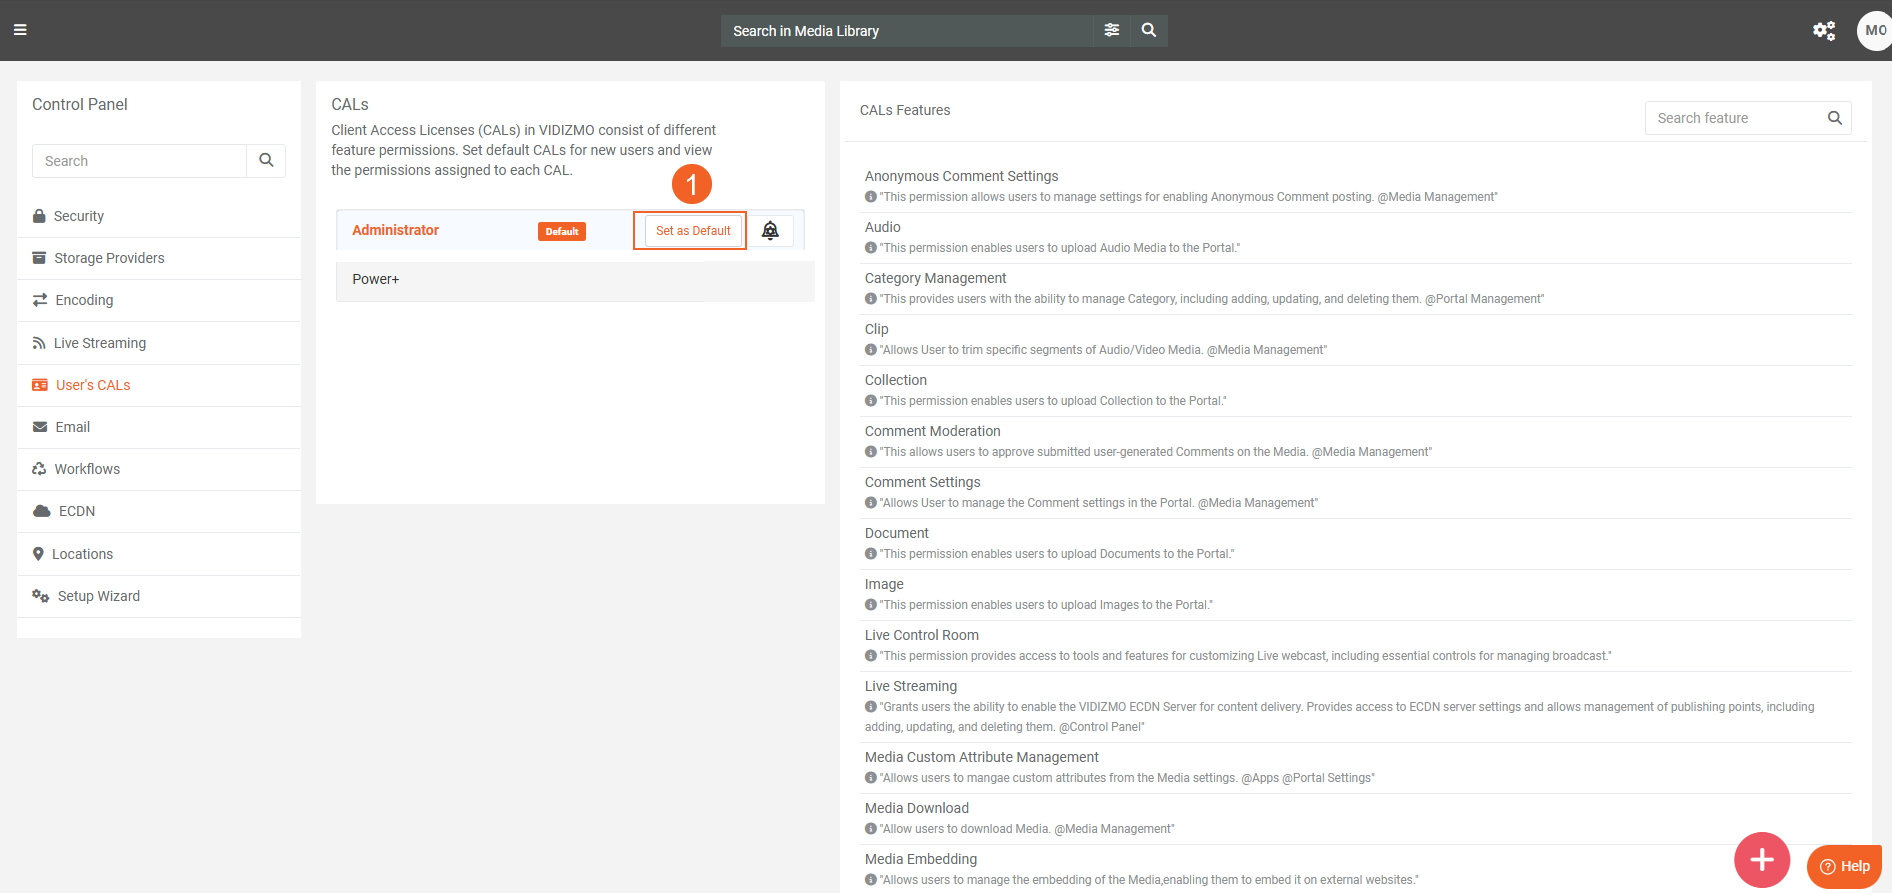
Setting Default CAL
- Navigate to the desired CAL. Click the "Set as Default" button.
The selected CAL will now be set as the default.

A notification will be displayed to confirm that the default CAL for the portal has been successfully set.
Setting Up Notification Settings
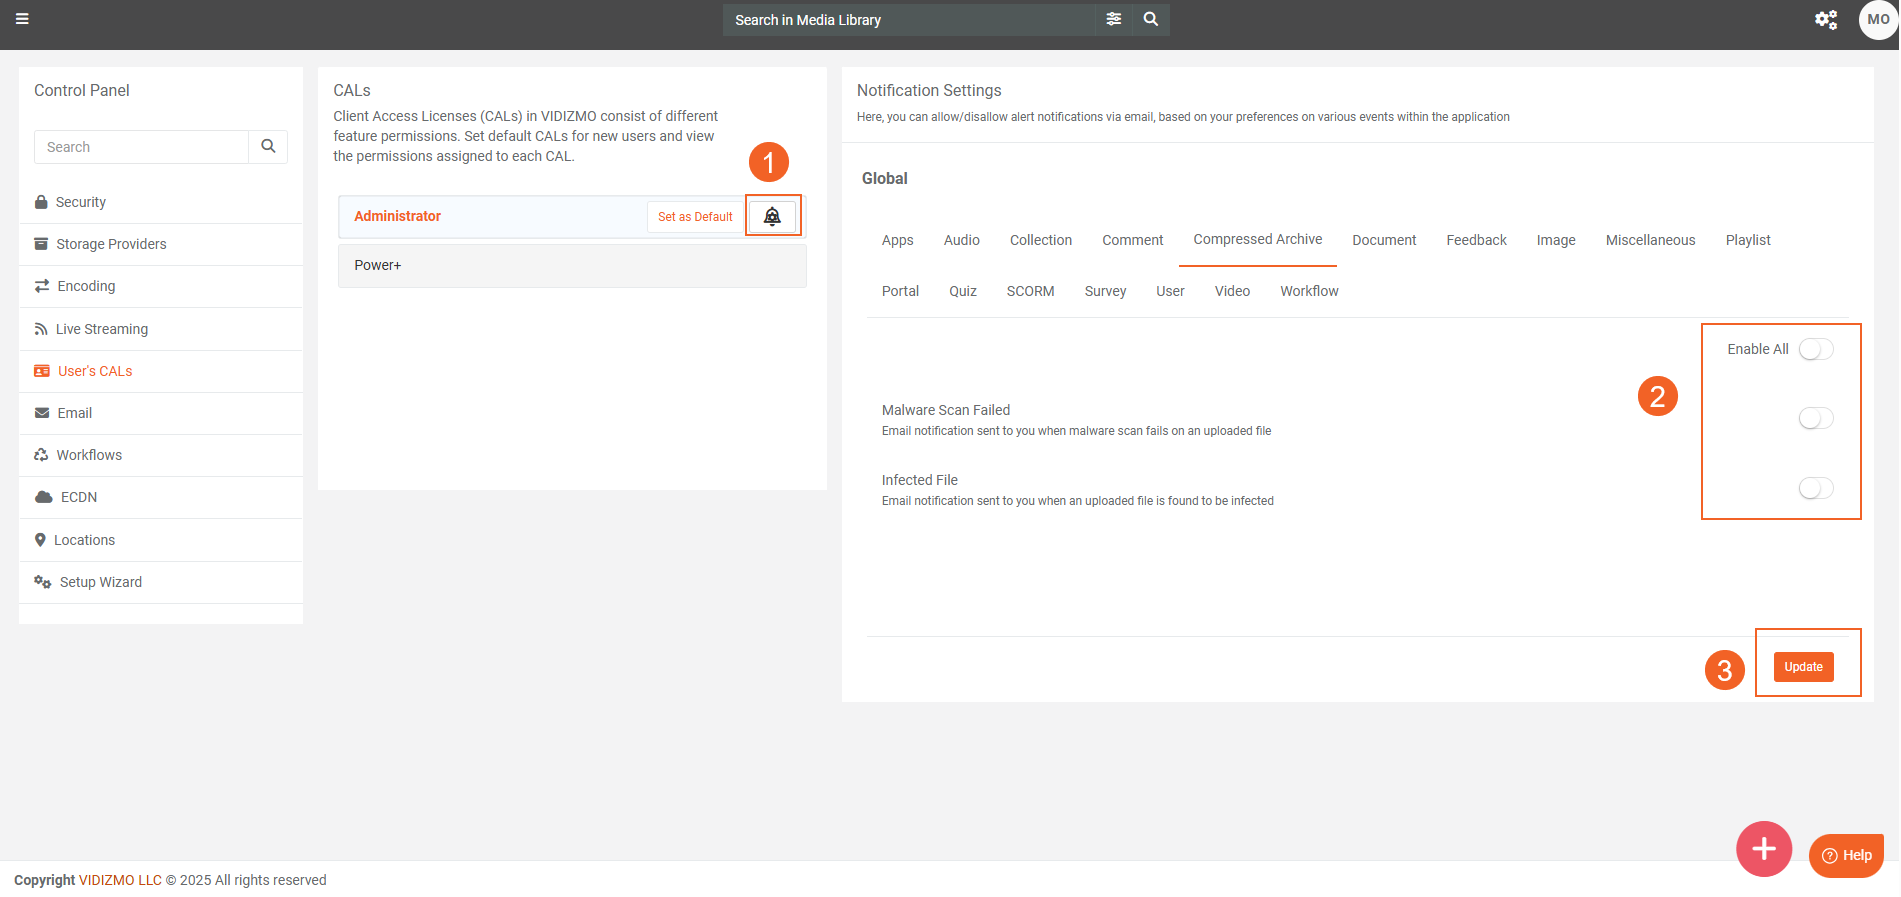
Follow these steps to configure notification settings:
- Navigate to the desired CAL. Click the "Bell Icon" button.
- To enable notifications for a specific event, toggle the switch ON. Alternatively, use the "Enable All" toggle to activate notifications for all events of this type.
- Click the "Update" button to save your settings.
